Followers

Tuesday 31 March 2015

Brighten My Day

Good Morning, My Crafty Friends, Followers and Visitors

Hope you are all well and coping with these strong winds, when
I keeping asking myself are we going to get some nice warm weather.

Anyway lets not dwell on that subject, as otherwise we will all be
depressed for the day.

Not feeling 100% today, think might be starting with a cold as my head
feels mussy and I keep loosing my voice (some including my hubby
would say that's not a bad thing). Saying this I don't feel as bad  as
yesterday as I ached everywhere and felt so tired. In fact I came
back from Mums and fell asleep until go past 3.30pm and that my
friends is not like me as I tend to keep myself busy most of the time.

Anyway enough moaning for today, lets get on with things.
Hopefully tomorrow will see me better still, you the old
saying " You cannot keep an old dog down" well that me
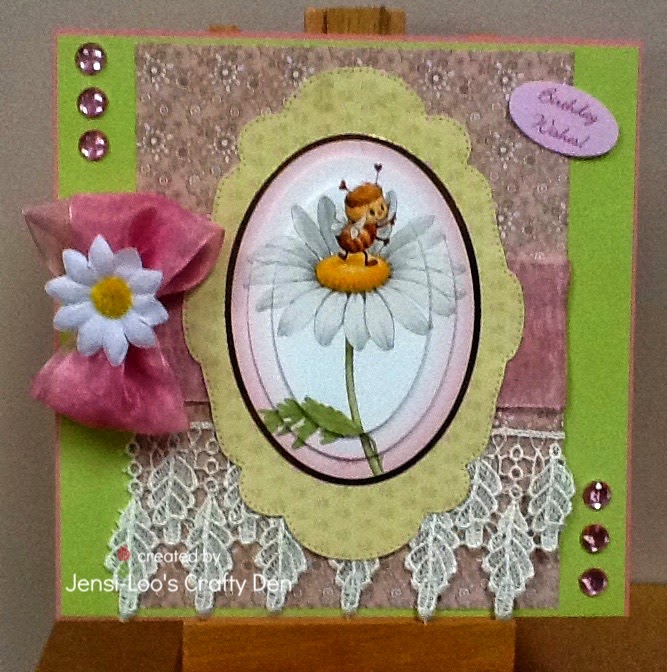
folks. Today's card is another made using the new Eden
 Cd from Polka Doodles, hope you like?.

DETAILS

1. Started with 7 x5 card white card and matted this with
paper from my stash.

2. Next stage was creating the borders down the side and
for this I used the Tonic over the edge die. I cut them 
using pale green satin card, once cut I adhered them to 
the card at slight angles so that they would match my
next layer.

3. Using the Eden cd I printed off the backing paper and
one of the frames and matted the backing paper onto
pink card, rounded the edges and stuck it onto my card.
The frame that includes the sentiment You Brighten My Day
was then adhered flat to the backing paper.

4. The image is one of the Pre Coloured ones off the cd
and was printed off onto smooth card.  Using the SB
die Labels 47 I cut it out twice, once in pale green
satin card (to match the side borders) and the other
in white card. I then laid them cross ways to each
other and adhered the image into the centre.

Well that's me done, will be back later to do
my rounds of your blogs and my commenting.

Not going over to Linda's today as she is to busy, so will
have a play around hopefully later once all the household
boring chores are done.

Until Next Time
As Always
Take Care and Happy Crafting
Jennifer xx

I would like to enter this into the following challenges
Bunny Zoe's Crafts Spring Colours 
Crafting from the Heart  Always Anything Goes
Craft Your Passion Always Anything Goes
Polkadoodle challenge  Week 13 Use a Die

Monday 30 March 2015

New Release

Good Morning Yet Again,

My Crafty Friends, Followers and Visitors

 I am back again and once again it is as a DT member

We are so excited and honoured  that  the Lil Patch design team has been asked to
showcase the New Release of the new Digi from

 Kith and Kin


and she is titled Easter Rose and will be available to purchase from today
30th March 2015 from Kith and Kin store. Just click HERE to go direct to store

DETAILS

1. Card is 8 x8 and I have matted it with green card and then
with patterned paper from First Edition Papers Pack

2. The image was printed onto super smooth card and coloured
using Copic's and the die cut using SB Fanciful Lattice.

3. To enhance the image I threaded yellow ribbon through  the
frame and the created a large bow.

4. Tonic flourish die used for the flourishes and the flower
was made using the flower die from SB.

To complete I added a dazzler to the ribbon and small butterfly.

A huge thank you  goes to Kith and Kin for allowing
us to use their new release.


Until Next Time

As Always

Take Care and Happy Crafting

Jennifer xx


Sunday 29 March 2015

Olivia

Good Morning, My Crafty Friends, Followers and Visitors

Well what a wash out this weekend is turning out to be. Wet and windy
just what we needed!!.

Hope you all remembered to put the clocks forward? 

Playing around in the craft room today I think, whatever you are are getting up to
enjoy.

Another Sherri Baldy to share today.
DETAILS

1. Card is 8 x8 and I have created an aperture in the front
and used acetate to give the window  effect.

2. The inside of the card has been matted using paper
from the cd Perfect Floral Companions from 
Creative Crafting World.

3. The image is called Olivia Oddsocks and I have coloured
her using Copics then die cut using an X cut large die.
I then inked around the edges with Tim Holts Peeled Paint
distress ink. The image was then adhered to the inside.

4. To take away the starkness from the front using the same
ink and one of the new stamps from Phil Martin I stamped
all around the edges.

To complete I added a butterfly, silver dome stickers and
flowers and leaves from my stash.

Well my friends that is all from me today, back again tomorrow
to showcase a new stamp release, so hope you will pop
back and take a look.

Until Next Time
As Always
Take Care and Happy Crafting
Jennifer xx


Saturday 28 March 2015

I Believe

Good Morning
 My Crafty Friends, Followers and Visitors

Well its Saturday, the weekend is here, anything exciting planned? or
will you just be chilling out.

I would like to welcome my newest follower Ladycakes and thank you for
following and I hope I can entertain and maybe bring a little inspiration as
we scroll through blog land.

Today I am sharing a card I have made using the new Eden Cd from
Polka Doodles.  If you like a bit of fairy fantasy, then take a look
at  this cd. I don't think you will be disappointed.


DETAILS

1. Started with an 8 x 8 card and matted it with pink
glitter card.

2. Next layer used was a piece of lilac flock paper that
has been sitting in my bit box for around 4 years
(I am not joking, it was one of those papers that
you just want to look at but not use)

3. The image is a pre- coloured one from the cd and I have
cut  out  the frame again in pale lilac card using the
SB Nestabilities Label 46 but only used part of the die
and I then adhered it over the image to act as the frame.

4. I used the Tonic Butterfly over the edge die and cut
four out of light and dark pink patterned paper 
and then adhered these down the sides of the card.

5. The top was created using Heartfelt Creations Raindrops on
Roses die again out the the same patterned paper as the
sides.

6. I have added a lace border along the bottom. The
sentiment (Believe in Love) that has been covered
down the side with mini flowers from Tattered Lace.
I also added the white flourish as I thought it 
needed something in that corner.

The flower was made using ribbon with a lilac brad
in the centre and I have used a scrap of lilac
 ribbon to create the tails. The pearls were made
 using Cosmic Shimmer PVA Purple Violet.

Hope you like and that you will call  back
soon and maybe, just maybe I might have hit 80 Followers
YOU NEVER KNOW.

Well my Friends, that's all from me today.

Until Next Time
As Always
Take Care and Happy Crafting
Jennifer xx

I would like to enter this into the following challenge
Polkadoodles Challenge week 13 Use a Die

Friday 27 March 2015

For You

Good Morning 
My Crafty Friends, Followers and Visitors

Well the end of the week is upon us, I trust you are all well?

Soon be Easter are you ready for the break and the Easter Eggs??

As usual off the mums this morning, hope to craft this afternoon, so
a short post today, hope to see you tomorrow.

DETAILS

1. Card blank is 5 x 7 and I have matted it with papers
from a paper pad bought form the Works called
What a Hoot. The size is 6 x 6 and there are loads
in the pack and for £4.99 its a steal.

2. The image is another Sherry Baldy and (don't faint)
I know her name its Filly Lilly. I coloured  her with
Copics and then die cut the image. To give more
depth I cut another frame from pink card to put
at the back of the image.

3. Before mounting the image on the card I took the
leftovers from the backing papers and made two
tags and put them behind the image.

To complete I added place butterfly and sentiment
Happy Birthday.

There you have it! hope to see you back soon.

Until Next Time

As Always

Take Care and Happy Crafting
Jennifer xx

I am entering this into the following challenges
Crafty Creations #285 Chevrons or Stripes
Crafty Gals Corner  Anything Goes
Scrappers' Delights #43 Always Anything Goes
Meet at Scrappers Corner Monthly Card Challenge  #10 Anything Goes
My Besties Friendship # 11 Spring Colours

Thursday 26 March 2015

Pretty in Red

Good Morning
My Crafty Friends, Followers and Visitors

Hope you are all well and getting ready for the weekend?

Just a quickie today as expecting my Thursday  visitors
Mary and Linda so will have to get sorted out and
open Jen's Bistro ready for lunch.

Today I have yet again chosen a My Bestie image
( I know you are saying what another one but I cannot help
it, I think I am addicted  to Sherri Baldy).
Apologies for the photo, its not showing at its best.

DETAILS
1. Started with an 5 x 7 card blank and layered this
with script paper from my stash, before I adhered
it to the card I wrapped red satin ribbon down and
across it.

2. The image was coloured with Copic's and then 
die cut using SB Majestic Labels Eight. I also
cut another frame and coloured it to add some
highlight to the image.

3. I created a chocolate box bow, added red roses
and the sentiment Happy Birthday
(looks like a red blog as the light reflected to bright)

Hope you all have a good day and hope to see
you back tomorrow.

Until Next Time
As Always
Take Care and Happy Crafting
Jennifer xx

Wednesday 25 March 2015

Let's Play

Good Afternoon,
My Crafty Friends, Followers and Visitors

I hope you are all well and ready for another challenge over at


Our theme is Boys and Girls Come Out To Play

Our sponsors  for this challenge are :-


Prize $20 Gift Certificate

and

Prize $10 Gift Certificate

My card was made using the Digi Veronica Lacy Sunshine pin Up Girl
from  Lacy Sunshine and can be purchased HERE.

More wonderful creations from my Design Team buddies are
waiting to inspire you over on the blog, so please go on over
and take a look.

DETAILS

1. Card size is 6 x6 and I have matted with paper from Craftwork Card
paper pack Butterfly Parade.
2. The image I printed onto super smooth card and coloured using
Copic markers  and it was then die cut using a SB die. I then cut
another frame out of purple card and adhered it to the back
of the image. It was then mounted onto the card using
foam pads to give more depth.

3. To created the fence I used The Tattered Lace Fence Die, cut the
fence in two and placed either side of the image. I made a 
tripple bow and secured it onto the card with a large gem
from my stash.

4. To keep within the confines of the challenge I die cut the 
alphabet, took the letters to create the words PEEK A BOO
and coloured them purple and adhered around the frame.
So therefore my Pin up Girl is playing hide and seek.

Hope to see you over on the challenge

Until Next Time
As Always
Take Care and Happy Crafting
Jennifer xx
I would like to enter this into the following challenges:-
Cheerful Stamp Pad In the Garden
Craft-Dee BowZ Anything Goes with a Handmade Bow
Crafting from the Heart Always Anything Goes
Get Creative Challenges # 11 DieCuts
Love to Scrap Anything Goes

Tuesday 24 March 2015

Fairy Garden

Good Morning 
My Crafty Friends, Followers and Visitors

How are we all doing today?

I would like to welcome Ameera who is my newest follower and to thank her and
each one of you for taking the time to pop over to my little piece of blog land.
If I carry on maybe I can make 80!! who knows.

Well its Tuesday and as you all know by now ( seeing as I am a creature of habit
sad I know) but I cannot help it, it's household duties this morning, then I 
am spending the afternoon playing in my craft room as I will not be seeing
Linda today but no matter I am sure I can keep myself amused.

I am going to show you the last of the images I won from
Nicky Burnett, sorry I do not know her name, well saying that
I did know her name but I have this stupid habit of writing the
names on the back of the image and  then I forget to write it
on some paper before I make the image into a card. Yes I know
I am a silly old fool and one day I will write it somewhere else
but for now don't hold you breath, he he!!
DETAILS

1. Card is 8 x8 and I have matted a piece of card stock
from the new Phil Martin paper pad Decadent Damask
I love these papers they are beautiful.

2. The image was coloured with Copic's and then
I created the frame from a Martha  Stewart punch to
fit around the image.

3. Next I added a lace border down the side and created
the flourishes from the Tonic Flourish Die and placed
around the frame.

To complete I made the bow using lilac (although it 
looks pink in the photo) and added a dazzler into the
centre.

I hope you will call back soon
Until Next Time
As Always
Take Care and Happy Crafting
Jennifer xx

I would like to enter this into the following challenges
Come and Get It  Things with Wings
Dragonfly Dreams Add some embellishments
Fairytale Stampers Anything Goes/Things with wings

Monday 23 March 2015

I Don't Mind The Rain

Good Morning
My Crafty Friends, Followers and Visitors

Are you all ready for another week- soon be Easter.

Quick post today  as it's Monday and I am off to Mums for the morning.
Today's card is yet again another Sherri Baldy, hope you like.

DETAILS

1. I made a stepper card using the die template from
Ruby Red Crafty and its so easy to use and you 
get a perfect stepper card every time. If you would like
to check it out use the link HERE.

2. I have covered the card with  this gorgeous 
card  from Kanban.

3. The image has been printed  onto super smooth and
coloured with Copic markers. Once done I went around
the edges with blue chalk. I have attached lace all around
the image before adhering it at an angle.

4. I used a thin  pink satin ribbon to create the bow and
left the tails long enough to go across the bottom of
the stepper. I then adhered two pink/white rose buds
to each end of the ribbon.

Until Next Time
As Always
Take Care and Happy Crafting
Jennifer xx

I would like to enter this into the following challenges
scrapbookstampsocietychallengeblog.challenge-62-anything-goes-option-easter

Sunday 22 March 2015

Give me Your Message

 Good Afternoon

My Crafty Friends, Followers and Visitors

Are you having a good Weekend and enjoying all the lovely sunshine?

I would like to welcome my newest follower DL'Art and I hope you enjoy
your visits.

A bit late today with my post as I have been getting cards ready for my blog
and having a tidy of my craft room.

Today card is one that I coloured up on Monday and I think the colouring is
my best yet, its true what is said Practice Practice or maybe it could just
be a fluke hehe we will see.

DETAILS

1. Started with 8 x8  card and covered it paper from the 
new range from Phil Martin Decadent Damask, as it 
was perfect to go with the image.

    2. The image was one that I won and is by Nikki Burnett 
and I think she is stunning. It was coloured using
Copic markers and then die cut using a SB die
 Once cut I inked the edges with Tim Holts Scattered Straw
and then  I sprinkled glitter around the edges for added effect.
 I also used glitter on the mask (sorry you cant see it very well)

3. To complete I added flat pearls around the edges added two
feathers and a green embellishment.

There you have it! Hope you will come back and
visit tomorrow.

Until Next Time
As Always
Take Care and Happy Crafting

I would like to enter this into the following challenges

Di's Digis Designs Lots of Green
Pattie's Creations March Green in your Image

Saturday 21 March 2015

Make it Three

Good Morning,
My Crafty Friends, Followers and Visitors

Well the weekend is here at last, hope you enjoy whatever you have
planned.

Today sees the start of a New Challenge over at Creative Craft Cottage 

and the theme is - THREE OF A KIND

Our sponsor is the fabulous EAST WING

 and the prize they are offering
is 3 single Digi images.

I have chosen to used the image LUCY LOO well with my
middle name being Lucy and  having Loo in my blog name
It just had to be her. To purchase Lucy Loo click HERE.

More details and the winners from the last challenge can be
found on the challenge blog and we would love you to pop
over and take a look at our lovely design team ladies work
and maybe leave a comment for them.


DETAILS

1. I have used quite a large size card for this one, its 7.5" x 9.5"
and scalloped edged.

2. First layer is black card, then I used a teal coloured leather look
paper from my stash, next a black layer again and a piece of
gold mesh effect paper also from my stash.  Before these
were matted onto the card I took black ribbon and wrapped
it around and down.

3. The image was coloured using Copic markers and die cut using
a Tattered Lace die. I used the same die to cut two black 
frames and joined them in the middle to create a large frame
to encase the image frame. This was then adhered to  the
card using foam pads.

4. For the theme I used three pearl hearts and placed them
down the black ribbon.

The sentiment Best Wishes from my stash.

There you have my Three of a Kind. As long as it's three of the
same thing you can put it on the card, easy so come on
have a go and be in with chance of winning some fabulous
images.

Until Next Time
As Always
Take Care and Happy Crafting
Jennifer xx
I would like to enter this into the following challenges

Crafting from the Heart #51 Always Anything Goes
Party Time Tuesdays #196 Anything Goes
Crafting with an Attitude Anything  Goes
Crafty Ribbons Anything Goes with ribbon
Sassy Studio Designs #273 Anything Goes
Aud Sentiments Challenge #127 Use a Two Word Sentiment
My Craft Creations Anything Goes

Friday 20 March 2015

Steampunk

Good Afternoon
My Crafty Friends, Followers and Visitors

How are we today, bet your glad its Friday?

Well did you manage to view the Eclipse - only thing I saw was the
sky went overcast as though it was going to pour down and saw the
sun go behind cloud ,Ah well maybe next time it might be a bit more
exciting.

Today's make is something I have never done before Steampunk and
I must say I did enjoy doing it.

DETAILS

1. Card base is 8 x 8 and I matted it with paper from the Tim Holt
paper collection idea-ology. Before I adhered it to the card I
went around the edges and distressed them.

2. Next using Robert Adams dies Clock, Cogs and pocket watch
I used gold card to create them and adhered them to the card.

3. Next layer from my stash was also distressed and inked around
the edges and I adhered this at an angle.

4. The image is from Nikki Burnett and was one of three that
I won (I will show the others next week) I think she is a
stunner and really had fun colouring her with my Copic's.
She was then die cut using a SB die and I again inked
around the edges with Tim Holts distressed ink Vintage Photo.

To add more effect I took a piece of old chain and glued it to
look as though it was wound around the cogs and then added
a key to the bottom.

Well that is it from me today but I will be back tomorrow
with my DT head on for a new challenge over at
Creative Craft Cottage and it starts at 8.00am GMT time

I hope you have enjoyed todays blog and that you will leave me
a comment, because I really do read each one and appreciate 
you taking the time.

Until Next Time
As Always
Take Care and Happy Crafting
Jennifer xx
I would like to enter this into the following challenges
Crafting with an Attitude  #1 Anything Goes
Party Time Tuesdays #196 Anything Goes
Copic Spain Challenge Anything Goes Copic Markers Only
My Craft Creations Anything Goes

Thursday 19 March 2015

Togetherness

Good Morning
My Crafty Friends, Followers and Visitors

I hope you are all well on this chilly Foggy morning.

Did not realise how chilly it was until I took Oscar for his walk, I was freezing
and typical of dogs Oscar wanted to stop and sniff every gate post.

Hopefully it will turn out sunny like yesterday, as it was lovely in the sun, I even
managed to get some seed planting done.

Anyway onto to today's project, I have again chosen to use another
Bestie by Sherri Baldy and I think its one that I won from Holley
but not quite sure ( age getting the better of me)

I adore using the Besties as they are all so cute and fun to colour, hope you like

DETAILS

1. Card base is 6 x 6 and I have matted it with paper from
my stash.

2. I then used a Tonic over the edge die to create the border
down the side and the glittered it.

3. The image has been coloured with Copic markers
and the die cut using SB die Pearl Effects.

4. Two heart shaped doilies were coloured over before
adhering to the base. The image was then matted
onto the doilies at a slight angle.

5. I then took the Tattered Lace Kaleidoscope Corner
die and used purple card stock. I did not want to
use it as a corner I wanted it to balance out the
other side.

To complete I added ribbon flowers from my stash.

I hope you have enjoyed you visit and that you will leave
me some love before you go.

Hope to see you back tomorrow

Until Next Time
As Always
Take Care and Happy Crafting
Jennifer xx

I would like to enter this into the following challenges
Inspiration Destination 25 Always Anything Goes
Scrappers' Delights #43 Always Anything Goes
Papertake Weekly Happy Anything
Party Time Tuesdays #196 Anything Goes

Wednesday 18 March 2015

Milly

Good Afternoon,

My Crafty Friends, Followers and Visitors

Blog post today is showcasing my DT creation for our next challenge

The theme is  - Use Your Favourite Embellishments

Our sponsor for this challenge is Pink Gem Designs.

Prize - 2 Individual images of winners choice
(not sets or Watermarks)

The image I have chosen to showcase is called
Summer Milly and can be purchased HERE

The design team have created some great cards over on the
challenge blog, so why not pop over and take a peek and
whilst you are there join in, we would love to see you work.

DETAILS

1. Fancy edged white card that I have embossed with
a butterfly embossing folder. To pop the embossing
I have inked over with Adirondack Pink Sherbet.

2. Next layer was plain white super smooth card and
I created a frame to encase it and again using the
same ink I went around the edges.

3. The image has been coloured using Copic's and then
die cut using a SB die.  Before adhering to the frame
 I  placed a paper doily to one side. Before sticking
on the gems I added a piece of lace to the side panel.

4. For the theme Use your favourite embellishments, well
I have three so therefore I decided to use them all, so
we have Flowers, Ribbon and Gems.

I do hope you will come and join us, we will
be waiting.

Until Next Time
As Always
Take Care and Happy Crafting
Jennifer xx
I would like to enter this into the following challenges
Craft-Dee BowZ  Anything Goes with a Handmade Bow
Crafting from the Heart - Always Anything Goes
Craft Your Passion Always Anything Goes
Love to Scrap Anything Goes
Marvelous Magnolia - Bow
Robyn`s Fetish - #255 Purple and Green

Tuesday 17 March 2015

Bring Me Flowers

Good Morning,
My Crafty Friends, Followers and Visitors

Hope you are all well ? 

Today I made another quick card using Hunkydory. These kits are so well
Thought out that you cannot fail to make a lovely card. 
   This will be last one using Hunkydory for a while but I will use up the rest
of my stash later.

Busy day, firstly housework then over to Linda's this afternoon for a spot of
Crafting and lastly hair done at 3 30pm.

DETAILS

1. Card size A5 and I have matted it with card stock
from the Hunky-dory kit. Before I adhered it to
the card I wrapped Lilac organza ribbon down the side.

2. The image has been decoupaged and I used foam
pads to adhere to the card.

3. The sentiment has been die cut with Robert Adam
die and I created a chocolate box bow.

Well my friends, that is all from me today but I will be
back tomorrow, hope you will be.

Must dash and make a start or I will not be finished doing
my chores.

Until Next Time
As Always
Take Care and Happy Crafting
Jennifer xx


Sunday 15 March 2015

No I'm Not Playing Ball

Good Morning

My Crafty Friends, Followers and Visitors

Quick post today as lots to do and have to go and visit
my Mum and Mum in law.

Hope you all have a nice day whatever you are getting up to.

DETAILS

1. Card size A5 and I have matted it with paper from my stash.

2. Using a SB die I cut a piece of  Adorable Scoreable  blue
card and adhered it to the card.

3. The image is again from the Hunkydory Morehead collection
and is  decoupaged and laid flat onto the card.

The sentiment is also from the kit. I really like this little
image as it's so cute - don't you think so?

As I said earlier, enjoy your day and hope
to see you again tomorrow.

Until Next Time

Take Care and Happy Crafting
Jennifer xx


Saturday 14 March 2015

Three Cuties

 Good Afternoon

My Crafty Friends, Followers and Visitors

Hope you are all enjoying the weekend?

Late post today as still catching up with DT work but almost done
so should be back on track from tomorrow.


Today I am sharing another  card made using Hunky dory

DETAILS

1. Started with an A5 card and inverted two corners

2. Using paper from the Hunky dory kit I wrapped 
a piece of hessian around the centre, inverted
all the corner before adhering to the base card.

3. The image are all from the Hunky-dory 
Morehead collection and  I used gold mirri
card behind each image and again inverted
the edges to emulate the images. They
were then adhered to the card using
foam pads.

4. Both sentiments were also in the kit.

There you go, another one done.

Hope you all have a nice day tomorrow
even if your not a mum, enjoy the day.

Hope to be back tomorrow sometime

Until Next Time
As Always
Take Care and Happy Crafting.

Jennifer xx


Friday 13 March 2015

Loving The Pollen

Good Morning,
My Crafty Friends, Followers and Visitors,

Well its' Friday, another week nearly over, are you all looking forward to the weekend?
I see that I have another follower, Donna, thank you and I hope you will enjoy
your visits.  Just realised its Friday the 13th, hope you are not to bothered at that, me
I don't mind it as it's usually a day when everything just falls into place somehow.

Short post today as off to mums for the usual Friday clean up morning, then
home to get on with some crafting. Just to keep you posted, as you know my
cousin Mary visits on Thursday's but I am sorry to say she is poorly and
is in hospital with chest trouble. Fingers crossed that she makes a  speedy
recovery from this awful chest infection.


Today's make is again using part of the Hunky-dory kit that has been sitting
in a draw, not sure if its part of the Moor head but whatever it is I think
its quite cute and lets face it, with any Hunky dory kits you cannot
fail to create something really nice.

DETAILS

1. 8 x 8 pink card base and to this added a piece of
green card stock.

2. Using paper from my stash I wrapped a wide pink
organza ribbon around it and also a piece of fancy
lace before adhering it to my base.

3. Next came the yellow patterned paper that I die
cut.  The image is decoupaged and was laid
straight onto the die cut.

4. I created a large bow from the same organza ribbon
and adhered a large daisy (from my stash) into the
centre. 

To complete I added pink gems and a Birthday Wishes
sentiment.

That as they say is that for today anyway.
Hope to see you back soon, hopefully tomorrow

Until Next Time

As Always
Take Care and Happy Crafting

Jennifer xx

Wednesday 11 March 2015

Fairy Wishes

Good Afternoon
My Crafty Friends, Followers and Visitors

Half way through another week and it being Wednesday  that means
A New Challenge starts today at


The Theme is RIBBONS AND BOWS

Thank you so much to everyone who joined us  last week.
As always we had a fantastic response  to our challenges and
we really appreciate all of you.

This week our fabulous sponsors are:-

The Stamping Boutique   who's prize is 2 Digi images of winners choice
and
Sparkle N Sprinkle who's prize is 3 Digi images or sets from the SNS
exclusive lines.

The image I have chosen is from The Stamping  Boutique and is
named Birthday Fairy and can be found  HERE.

       If you go to our challenge blog you will
 be inspired by our super DT ladies
         stunning work and they are eager to see
what you will come up with.


DETAILS

1. Card is 5 x7 fancy edged from my stash and I have
added pink ribbon all around the edges and made
two bows at each top end corner.

2. Next layer is pink patterned card from my stash
and I have punched holes at each corner, then
threaded pink and brown satin ribbon in a x cross
formation and then made four tiny bows and
adhered them to each corner before matting
it onto the card.

3. The image has been coloured with Copic pens
and I have added glitter to her wings, wand,
candle flame and the cupcake. It was then
die cut using SB die Grand Labels  Eleven
and inked around the edges with Adirondack Lights
Pink Sherbet.

4. Two more holes were punched at the top and bottom
of the image and bows added to enhance.

That's all from me today folks, waiting
to see you creations!!

Until Next Time
As Always
Take Care and Happy Crafting
Jennifer xx

I would like to enter this into the following challenges :-
Crafty Sentiment Designs Birthday
Party Time Tuesdays # 196 anything Goes
Through The Craft Room Door Always Anything Goes
Craft-Dee BowZ Anything Goes with a handmade bow
Crafting from the Heart - Always Anything Goes
Craft Your Passion Always Anything Goes
Through the Purple Haze Anything Goes

Tuesday 10 March 2015

On Me Head Son

Good Morning

Mt Crafty Friends, Followers and Visitors

How are all this Tuesday? Household duties calling this morning,
Linda here this afternoon for a colouring session and as usual
coffee and biscuits. Oh what a gay day!!

Today I am showing you another  card made using the Hunky dory 
 Moorhead's collection.

DETAILS

1. Card blank is 5 x 7 and I have matted it with
a matching  card stock from the collection.

2. Next I took another piece of card cut to size and
created two tags, then adhered them to the base.

3. The image I have left in the frame as it  matches
 the base layer.

To complete I added the sentiment BACK OF THE NET.

Hope you have enjoyed your visit
More tomorrow.

Until Next Time
As Always
Take Care and Happy Crafting
Jennifer xx

I would like to enter this into the following challenge-
TBA


Monday 9 March 2015

Flower Canvas

Good Morning
My Crafty Friends, Followers and Visitors,

Hope you are all ok and ready for the week ahead.

Off to Mums this morning, ironing later and then back to crafting.

As I promised yesterday, I am showing you today the canvas
that I made last week when Linda and I went to Kath's.
I had a fantastic day, Kath taught me a lot (if I remember it all
is another thing) and was a lovely hostess and made me feel
very at ease.

I would like to say a big thank you to both Kath and Linda
for a wonderful day.


I cannot take credit for the design as I just followed what
Kath told me to do, although I did place everything on
the canvas then asked if it looked ok before I glued it
all down.

The two little sentiments ready (top) Treasure and (bottom)
Time.

I had a fab time doing this canvas the only down fall
was using my hot glue gun as I managed quite a
few times to get hot glue on my fingers (not recommended)

I can now say that this little masterpiece has taken pride of
place in the living room and every time I  pass it I give
a little smile. Daft I know but what the heck I am proud.

Well folks that all I have time for today
hope to see you back tomorrow

Until Next Time
As Always
Take Care and Happy Crafting
Jennifer xx

I would like to enter this into the following challenges

As you like it Challenge Favourite Anything But A Card
Altered Eclectics - Anything Goes
Glitter n Sparkle Anything Goes
Rhedds Creative Spirit Anything Goes

Sunday 8 March 2015

Ring of Pearls

Good Afternoon
My Crafty Friends, Followers and Visitors,

Well a bit of change to the weather today, so glad I decided to tackle my
garden yesterday. It was beautiful and quite warm in the sunshine and
oh doesn't it give you a lovely feeling to see the sun and feel its heat.
I am a happy bunny now that it's all done and tidy, seeds planted
just some more to sow and some to sow in the greenhouse.

So how are we all anyway, bet there is lots of crafting being done.
I have made a start on my DT work and managed to make some
cards using some Hunky-dory sets I found hiding in one of my
draws, so I will post them over the next week.

Here is the first one
DETAILS

1. Card is a 7.5" x 6" linen effect.
2. Using a piece of the Hunky-dory card I cut to
size and then wrapped a piece of blue violet 
satin ribbon around the centre, next I took
some lace and wrapped that on top of the
ribbon before adhering it all to the base.

3. The image has been decoupaged and placed
in the centre and to enhance it I have gone
around the frame with flat base pearls from
my stash, also adding them along the top
and bottom of the card.

There you go, easy peasy but I think very effect.
I will say that one thing about Hunky dory is
that you cannot fail to make some beautiful
cards.

Well that's all from me today, tomorrow I will
post my canvas that I made at Kath's last
Wednesday.

Until Next Time
As Always
Take Care and Happy Crafting
Jennifer xx


Saturday 7 March 2015

Bobby

Good Morning,
My Crafty Friends, Followers and Visitors

Hope you are all well and I would like to welcome my new followers and
just to let you know if you leave me your blog address I will visit you  and
this goes to all my other followers if I am not already following you I
apologise.

Now as its the 7th (already) and that means our fortnightly challenge is starting
 over at
Creative Craft Cottage   and our theme is Not Quite Straight.

Our fabulous  sponsor for this challenge is

 Rick St Dennis and the prize will be 2 Digi images of your choice

We would love you all to join in and this is an easy challenge and we are
waiting to see your creations. Our lovely design team have been working
hard and have created some stunning cards for inspiration should you
need any and it would be lovely if you could pop over to the challenge
blog and not only join in but leave a comment whilst your there.

My DT make has been made using the image Back To School Bobby
you can find him here and I hope you like what I have done.


DETAILS
1. Started with an 8 x8  cream card and made it into an easel card.

2. Using black card I have embossed it with a brick effect and
then matted it onto the card.

3. The image has been coloured with Copic pens and then
matted onto a circular card that has also been embossed.
He has been placed at an angle to keep within the theme
and I have used foam pads to adhere.

4. Taking paper from my stash I have torn and placed at angle
behind the image and along the stopper.  There is also
a piece of torn map that I added.

5. The stopped has been created by using the same black 
embossed card but I have torn it to created the wavy
effect.

To complete I have added the two wooden letter from stash to create
the work HI as to me that is what he could be saying.

So my friends, I do hope you will join in and support us
looking forward to seeing  what you come up with.

Until Next Time
As Always
Take Care and Happy Crafting
Jennifer xx
I would like to enter this into  the following challenges

Country View Crafts' Challenge Anything Goes
Crafting with an Attitude #1 Free Style Anything Goes
Red Rubber Inspirationals #210 For the Boys
Artbymiran Challenge #27 Anything Goes
Brown Sugar # 135 Anything Goes

Crafts Galore Encore Anything Goes with stamp or Digi

Friday 6 March 2015

Anniversary Wishes

Good Afternoon,
My Crafty Friends, Followers and Visitors

Firstly I wold like to welcome Denise, who is my latest follower  and
I hope you enjoy your visits.
Secondly, Apologies for no post yesterday, the day just seemed to run away
with me. Tried to get things sorted but just doing one card seemed to take
me forever. Thursday as you know is visiting day for Mary so I am
always pressed for time, must get more organised  (says she).

Anyway today I am showing you a card for my friend and  neighbour who
celebrated their anniversary a couple of weeks ago and now I thing its
ok for me to share.
DETAILS

1. White  8 x 8 card that I embossed and added black Cosmic
Shimmer Glossy PVA to create the pearls.

2. Next layer was black card, then using one of the new
Tonic Dies I cut the frame out of white pearlescent 
card and adhered it to the black frame.

3. Using back card stock I cut the flourishes and flower
and placed them down the side.

To complete I added black ribbon and secured the ends with
small dazzlers. I then created  a box and also decorated
it with black Tonic large corners, flourishes and 
flowers. (picture below)

I am not being morbid using black and white but these
are the colours that my friend loves.

Well I hope you all have a pleasant evening, off to do the
 blog rounds and catch up on some DT work.

Hope you will call back tomorrow as I will be showing
my DT work for Creative Craft Cottage.

Until Next Time
As Always
Take Care and Happy Crafting
Jennifer xx

I would like to enter this into the following challenges

Sassy Studio Designs #271 To Die For
Brown Sugar #135 Anything Goes
Crafty Catz #268 Use your Dies /Punches

Country View Crafts' Challenge Anything Goes

A Rose So Sweet

Good Morning My Crafty Friends, followers and Visitors Welcome to today's  challenge  #  105  over at  Creative Craft Cottage...